Back to articles
Recording Vocals At Home Like a Pro

Let's get one thing straight: the idea that you need a six-figure studio to record professional-sounding vocals is a myth. Countless musicians produce incredible, release-ready tracks right from their own homes. It’s all about having the right gear and, more importantly, knowing how to use it.
Your Roadmap to Studio-Quality Vocals at Home
This guide is your complete roadmap. We're going to break down the entire process into four crucial areas: picking the right equipment, treating your room, getting the most out of your software, and—of course—delivering a performance that connects with listeners. These are the practical, real-world steps that actually make a difference.
There's never been a better time to get started. The technology for home studios has come so far, making high-quality production more accessible than ever before.
It's a massive shift. In fact, recent reports show that over 80% of independent musicians now use a home studio as their main recording space. This isn't a coincidence; it's a direct result of affordable gear and powerful software finally putting pro-level sound within reach for everyone.
But First, Get Your Lyrics Right
Before you even touch a microphone or open your recording software, let's talk about the absolute foundation of a great vocal track: the lyrics. When you walk into a session with words that are powerful, polished, and ready to go, you can put all your energy into the performance and emotion. It changes everything.
This is where a creative assistant like Lyric Studio can be a lifesaver. It’s a powerful tool for pushing past writer's block, offering AI-driven, context-aware lyric suggestions that adapt to your theme, emotion, and genre.
Magic Draft: This feature instantly generates a first verse-and-chorus to jump-start your songwriting process.
Integrated Tools: You also get a built-in rhyme finder and thesaurus, which helps you refine your word choice until every line lands perfectly.
Once you’ve captured that flawless vocal take, you need to get it out there. Learning how to properly market your music is just as important as recording it. A great place to start is by mastering video marketing for social media to connect with a bigger audience.
The growth in this space has been explosive. The global music production software market alone jumped from roughly $750 million in 2019 to over $1.1 billion by 2023. It’s a clear sign that home recording is here to stay.
Feeling inspired to write lyrics that will lead to an unforgettable vocal take? Download Lyric Studio free on iOS and start crafting your next song right now. Please note that the app is free to download, but in-app purchases may apply.
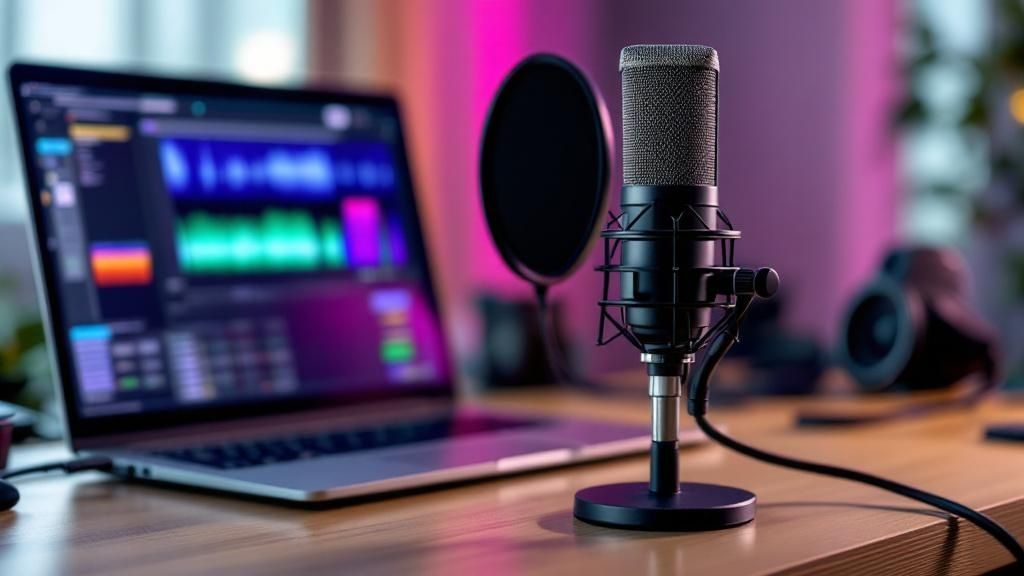
Choosing Your Vocal Recording Equipment
Stepping into the world of home recording gear can feel like you’re trying to solve a puzzle with a million pieces. All the technical jargon and endless options are enough to make anyone's head spin. So, let's cut through that noise. We'll walk you through the essential gear you actually need to record vocals at home and explain why each piece matters so you can make smart choices right from the start.
The goal isn't to buy the most expensive microphone on the shelf. It’s about finding the right gear for your voice and your room. A well-chosen, simple setup will always sound better than a pricey mic in a bad space.
This image gives you a bird's-eye view of the whole process, from gear to final take.
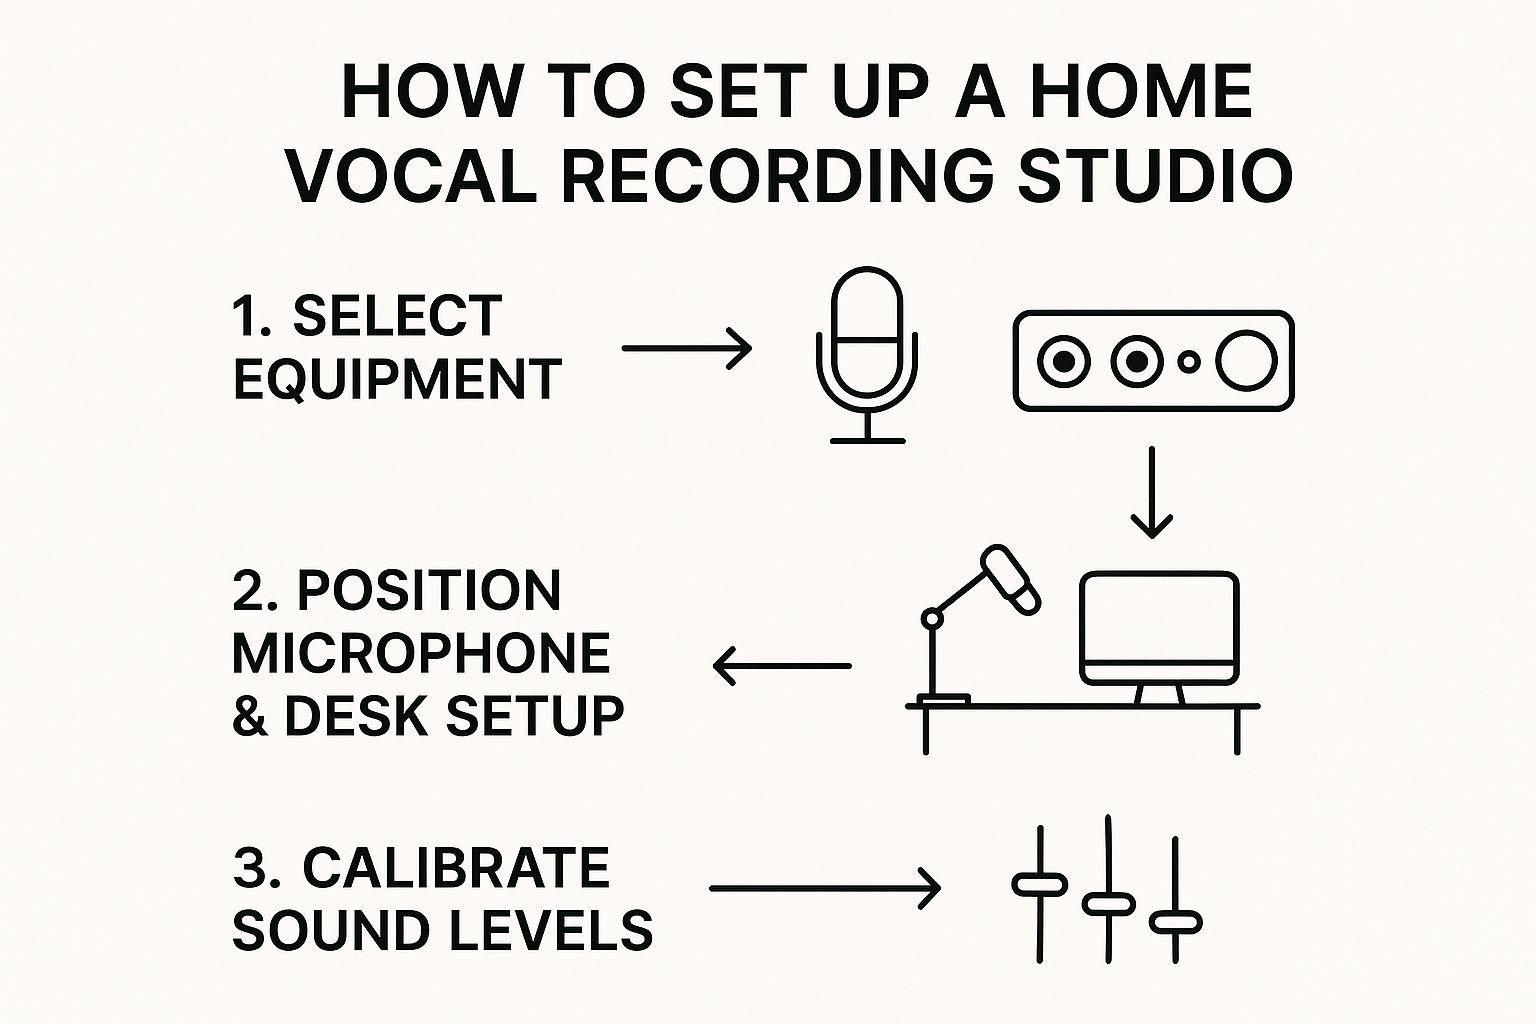
As you can see, it all begins with your core equipment. This is the heart of your recording setup, the signal chain that will capture your voice.
The Microphone: Your First Big Decision
Think of your microphone as the first and most critical link in the chain. It’s what turns your voice from sound waves in the air into an electrical signal your computer can understand. For vocals, you'll mainly be looking at two types: condenser and dynamic mics.
Large-diaphragm condenser microphones are the standard for most studio vocals, and for good reason. They are incredibly sensitive, capturing a rich, detailed sound with a ton of clarity, especially in the higher frequencies. This makes them perfect for picking up every little nuance of a performance, but they work best in a quiet, well-treated room. A great, budget-friendly starting point is the Audio-Technica AT2020.
Then you have dynamic microphones, like the legendary Shure SM58. These are famous for being tough-as-nails live mics, but their lower sensitivity is actually a secret weapon for home studios. If your room isn't acoustically perfect, a dynamic mic is much better at rejecting background noise. It can also handle loud, aggressive vocals without distorting, making it a very forgiving choice for many artists.
USB Mics vs. Audio Interfaces: What's the Difference?
After you've picked a mic type, you have to decide how it will talk to your computer. This leads to a fundamental fork in the road for your home studio.
USB Microphones: These are the ultimate all-in-one solution. The mic has the audio interface built right in and connects straight to a USB port. It’s pure plug-and-play, which makes them ideal for beginners or anyone who values convenience and a minimal setup.
XLR Microphones and Audio Interfaces: This is the more traditional—and more flexible—path. An XLR mic plugs into a separate box called an audio interface, which then connects to your computer. The interface handles a few crucial jobs: it supplies power to condenser mics (called phantom power), provides a higher-quality preamp to boost the signal cleanly, and gives you hands-on controls for volume and headphone monitoring.
An audio interface is a serious step up. It not only gives you better-sounding components but also opens the door to adding more mics or instruments down the line. For any artist serious about recording, it's a wise long-term investment.
Of course, great gear is only half the battle. If you're fumbling with your lyrics, your performance will suffer. That's where a tool like Lyric Studio comes in. With genre and mood customization for hip-hop, pop, and R&B, it helps you smooth out your lines so you can focus completely on delivering a powerful take.
Essential Accessories You Can't Skip
Beyond the mic and interface, a few small items can make a huge difference in your recording quality. These aren't just nice-to-haves; they are fundamental tools for getting a clean, professional sound.
Closed-Back Headphones When you record, you need to hear the backing track without it "bleeding" into your vocal microphone. Closed-back headphones are designed to create a seal around your ears, keeping the music in and preventing that bleed. This is an absolute must-have for clean recordings.
A Pop Filter You know that mesh screen you see in front of studio mics? That’s a pop filter. Its job is to stop the harsh bursts of air from "P" and "B" sounds—what we call plosives—from hitting the mic and creating ugly, low-frequency thumps. It’s a cheap accessory that will save you countless headaches.
With your gear chosen, you’ve laid the foundation for your home vocal studio. You now have the tools to capture your voice. The next step is making sure your lyrics are just as polished. You can Download Lyric Studio free on iOS to craft lyrics that will inspire your absolute best performance. Keep in mind the app is free to download but offers in-app purchases.
Turning Any Room Into a Vocal Booth
Here’s a hard truth: you can own the most expensive microphone on the market, but if your room sounds like a concrete box, your recordings will too. This is probably the single biggest hurdle for artists trying to capture great vocals at home.
The good news? You don't need to hire a contractor to build a pro studio. You just need to understand what you're up against: sound reflections.
When you sing, sound waves shoot out in every direction. They bounce off hard, flat surfaces—your walls, ceiling, floor, and even your desk—creating a mess of echoes and reverb. Your mic is a bit too honest; it captures both your direct voice and all those reflected sounds. The result is a thin, distant, and unprofessional vocal take. Our job is to stop those reflections before they ever hit the microphone.
Why Your Room Fights Your Recordings
A typical bedroom or office is an acoustic nightmare. It’s usually a boxy shape with parallel walls and plenty of hard surfaces, which are the main culprits behind bad vocal recordings. Before you do anything else, try this simple test. Stand in the middle of your recording space and clap your hands once, loudly.
Listen carefully. Do you hear a sharp, almost metallic ringing sound? That's called flutter echo. Or do you hear a messy wash of sound that seems to hang in the air for a second? That's reverb. Both of these will instantly muddy up your vocal track and make it a nightmare to mix later on.
The struggle with room acoustics is real. A 2024 survey showed that while 72% of home recorders use some form of basic acoustic treatment, only a mere 22% feel their results are on par with professionally treated studios. That gap matters. One analysis found that tracks from untreated rooms face a 12% higher rejection rate from playlist curators.
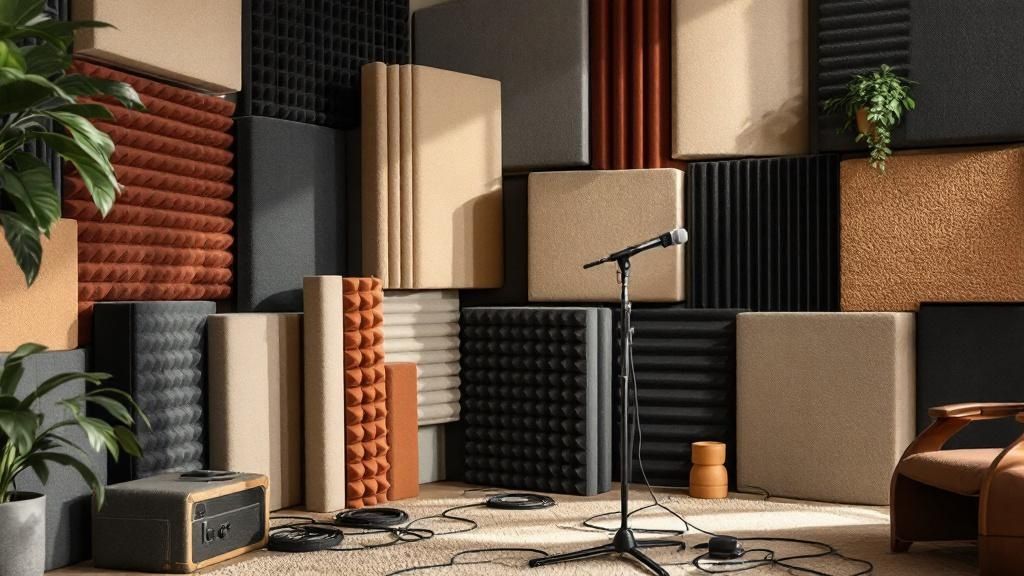
Building a DIY "Vocal Fort"
Let's forget about expensive, fancy acoustic panels for a minute. You can get surprisingly good results using stuff you probably already have lying around the house. The strategy is simple: surround your microphone (and yourself) with soft, absorbent materials. This creates a small, "dead" space that soaks up those pesky reflections. This is often called the "vocal fort" method.
Here’s how you can build one:
Find Your Spot: The absolute best-case scenario is a walk-in closet packed with clothes. All that fabric is a natural sound absorber. If you don't have one, the corner of a room is your next best bet, as it naturally helps break up sound waves.
Bring in the Blankets: Grab some heavy moving blankets, thick comforters, or duvets. Drape them over a few microphone stands arranged in a U-shape around where you'll be singing. The thicker and denser the material, the better it will be at absorbing sound.
Treat Behind You: Don't forget the wall behind you! Your voice projects forward, but sound radiates everywhere. Pushing a couch up behind you or hanging more blankets is just as important as treating what's in front of the mic.
Look Up and Down: A thick rug on a hard floor is non-negotiable. If you have a low ceiling, you can even have a friend hold a thick blanket or a duvet above the mic while you're recording. This kills those critical first reflections from the ceiling.
This simple setup can make a night-and-day difference in the clarity of your recordings, giving you a focused, dry vocal sound to work with. It's a cornerstone of any effective home recording studio setup.
By setting up a temporary booth, you'll be capturing your voice, not the sound of your room. That clean, direct signal is the foundation for any professional-sounding track.
Getting Your Recording Software Dialed In
Alright, your gear is ready and your room sounds good. It's time to dive into the heart of your digital studio: the Digital Audio Workstation, or DAW. This piece of software is your command center—it’s where the magic of recording, editing, and mixing happens.
Think of your DAW as the brain of the operation. It takes that pure, clean signal coming from your mic and interface and translates it onto your screen so you can see it, chop it up, and polish it. Getting this initial setup right is non-negotiable for a smooth workflow. If you're still on the fence about which one to use, our guide to the best music production software for beginners can point you in the right direction.
Making Sure Your Gear Talks to Your Software
First thing's first: you need to introduce your audio interface to your DAW. It’s a simple handshake, but a critical one. Dive into your DAW’s settings or preferences menu and look for the audio or playback engine options. From there, you just need to select your specific audio interface as both the input and output device.
This little step ensures your DAW actually listens to your microphone (the input) and sends all the sound back to your headphones (the output). It's a classic rookie mistake to skip this, leading to that frustrating "why can't I hear anything?" moment.
Choosing Your Sample Rate and Bit Depth
With your interface connected, you'll need to set the audio quality for your project. This is controlled by two settings: sample rate and bit depth. They sound technical, but the idea behind them is pretty simple.
Sample Rate: Think of this as the number of audio "snapshots" your computer takes every second. More snapshots mean more detail. For music, the industry standard is 44.1 kHz, which is CD quality. A lot of us record at 48 kHz these days, especially if there's video involved, as it gives a slight edge in fidelity.
Bit Depth: This determines your dynamic range—the space between the quietest whisper and the loudest belt. For vocals, 24-bit is the only way to go. It gives you plenty of headroom and keeps the noise floor super low, so your quietest, most emotional breaths don't get swallowed by digital hiss.
For just about any vocal session, setting your project to 48 kHz and 24-bit is the sweet spot. You get pristine, professional-grade audio without creating files that are so huge they slow your computer to a crawl.
The Most Important Step: Setting Your Gain
Before you even think about hitting that record button, we need to talk about gain staging. Gain is the input level of your microphone before it even gets recorded by the software. Getting this right is probably the single most important thing you can do for a clean, professional vocal take.
Too low, and your vocals will be weak and fighting to be heard over the background noise. Too high, and your signal will "clip," creating a nasty digital distortion that you absolutely cannot fix later. It's permanent.
Your job right now isn't to make the vocal loud. That comes later, during mixing. Your job is to capture a clean, healthy signal that gives you total flexibility down the road.
To set your gain, arm the vocal track in your DAW so you can see its input meter. Now, sing the loudest part of your song, likely the chorus, with the energy you plan to use in the actual take. As you sing, adjust the gain knob on your audio interface until the meter peaks somewhere between -18 dBFS and -10 dBFS. This range is the money spot—strong enough to be clear and detailed, but with plenty of headroom to prevent any surprise clipping.
With your levels locked in, you're ready to lay down some vocals. This is where all your prep work pays off. You can stop stressing about the technical side and focus entirely on the performance.
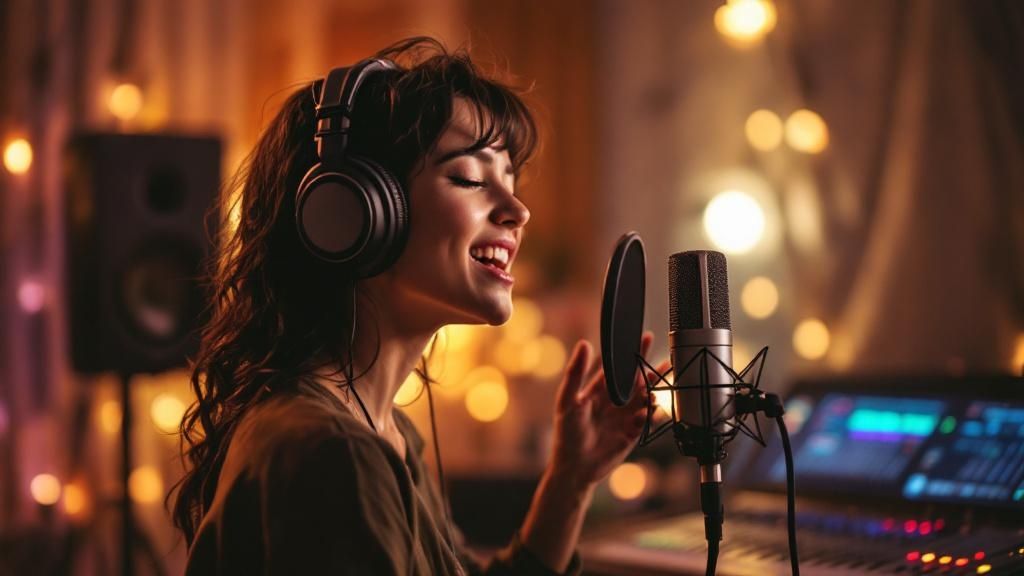
Capturing a Flawless Vocal Performance
Okay, all the technical gear is set up and ready to go. Now, we turn our attention to the one thing that truly matters: your voice. You can have the best equipment money can buy, but if the performance lacks emotion and connection, none of it will make a difference. This is where we step away from the science and into the art of it all.
The great news is that the line between a professional studio and a well-prepared home setup has become incredibly blurry. A 2023 Deloitte music study revealed that 63% of listeners couldn't reliably tell the difference between vocals cut in a world-class studio and those from a properly treated home space. With over 55% of Billboard Hot 100 tracks since 2021 featuring vocals recorded at home, it's proof that you can absolutely produce release-ready quality. You can dive deeper into the trends shaping the music recording market to see just how much has changed.
Finding the Sweet Spot for Your Microphone
How close you are to the microphone is one of the most powerful tools you have for shaping your vocal tone. There isn't a single "right" distance; it’s a creative choice that should serve the song's energy and the specific sound you’re chasing.
As a general rule of thumb, start about six to twelve inches away from the mic capsule, with your pop filter placed in between. Think of this as your neutral starting position.
Getting Closer (3-6 inches): Moving in closer introduces what’s called the proximity effect—a natural boost in the low-end frequencies that can give your voice a warm, intimate feeling. This is perfect for those quiet, breathy verses, but be careful. Get too close, and your vocal can quickly sound muddy or boomy.
Backing Off (12+ inches): Taking a step back from the mic gives you a more open, natural sound with less bass. This technique is fantastic for loud, belted choruses or for background vocals, as it helps them sit comfortably in the mix without cluttering up the low end.
The best way to figure this out is to simply experiment. Record a few lines at different distances and just listen. You’ll be surprised at how much difference a few inches can make.
The Art of Vocal Comping
Let's be real: nobody sings a perfect take from beginning to end. Not even your favorite artists. The pros rely on a technique called comping (short for "compiling"), and you should too. The concept is simple: you record the same section multiple times, then you listen back and stitch together the best words, phrases, and lines from each take to create one seamless, "perfect" performance.
Modern DAWs make this incredibly easy. Just set a loop around a section, like the first verse, and sing it five or six times in a row. The key is to not judge yourself while you’re recording—just perform. After you're done, you can go back and cherry-pick the moments where your pitch, timing, and emotion were exactly what you wanted.
This method takes all the pressure off. It frees you up to take risks and deliver a more dynamic performance because you know you can assemble the best parts later on.
Preparing for a Confident Performance
The final piece of this puzzle is your own mindset and preparation. A confident performance is an emotional one. When you aren't stumbling over lyrics or second-guessing your words, you can pour all that energy directly into your delivery.
This is why having your lyrics completely locked in beforehand is such a game-changer. When you've already used a creative assistant like Lyric Studio to sharpen every line, you're not debating word choices in the middle of a take. You can just sing.
Exploring how AI tools are helping songwriters can open up new creative avenues you might not have considered. Features like Lyric Studio's context-aware suggestions can help you build lyrics that feel complete, emotionally powerful, and perfectly suited to the song's mood. Walking up to the mic with that level of preparation allows you to perform with total conviction.
Ready to craft lyrics that will inspire your best vocal take ever? Download Lyric Studio free on iOS and feel the difference that solid preparation makes. Please note the app is free to download but may include in-app purchases.
Common Questions About Home Vocal Recording
Even with the best guide in hand, you're bound to run into a few questions as you start recording. It happens to everyone. Let's tackle some of the most common hurdles that new artists face when recording vocals at home.
What Is the Best Microphone for Home Vocals?
This is the big one, isn't it? The honest answer is there's no single "best" mic, because the right one really depends on your voice and your recording space.
That said, a large-diaphragm condenser microphone is where most people start, and for good reason. These mics are known for their sensitivity and ability to capture incredible detail, making them fantastic for picking up all the subtle nuances in a vocal performance.
However, if your room has some echo or you're a powerful, dynamic singer, a dynamic microphone could be your secret weapon. They’re built tougher, handle loud sources without breaking a sweat, and are much less sensitive to background noise. And for pure, plug-and-play simplicity, you can't go wrong with a quality USB condenser mic—it’s a great all-in-one solution.
How Do I Stop Background Noise in My Recordings?
After you’ve set up your DIY vocal booth, the best strategy is simply prevention. Before you even think about hitting that record button, do a quick sound audit of your space.
Turn off fans, air conditioners, and even your computer notifications. That little "ding" can ruin a perfect take.
If you can, unplug noisy appliances like a humming refrigerator or a space heater.
Listen for the quietest time of day. Recording late at night might be your best bet to avoid traffic, neighbors, and family activity.
Most vocal mics have a cardioid pickup pattern, which naturally helps by focusing on what's in front of it and rejecting sound from the sides and back. Use that to your advantage!
Remember, every bit of noise you prevent from being recorded is one less problem you have to fix during the mixing stage. A clean source recording is the ultimate goal.
Can I Really Get a Professional Sound Without Expensive Gear?
Yes. A thousand times, yes. If you take only one thing away from this guide, let it be this: Technique, performance, and a controlled recording space are far more critical than the price tag of your equipment.
I'd bet on a passionate, well-rehearsed vocal recorded on a $100 mic in a closet full of clothes over a sloppy take on a $3,000 mic in a bare, echoey room any day of the week. Your skill and preparation are what truly count. The magic of modern software is that it's designed to polish an already great raw performance, not fix a bad one.
And speaking of preparation, nothing kills a performance faster than fumbling over lyrics. When you’re confident in your words, you can pour all your energy into the emotion and delivery. That’s where a creative assistant like Lyric Studio comes in, helping you nail down those powerful lines before you step up to the mic.
Ready to write lyrics that will inspire your best vocal take? Lyric Studio can help you find the perfect words. Download Lyric Studio free on iOS and start writing your next hit. The app is free to download and may offer in-app purchases.

SCAN TO GET