Back to articles
Your Guide to a Pro Home Recording Studio Setup

When you're putting together a home studio, it really comes down to two things: the room you’re in and the gear you fill it with. The real secret isn't about dropping a ton of cash. It’s about being smart with your space and investing in a few key pieces of reliable equipment that will capture your sound cleanly right from the source.
Setting Up Your Space: The Foundation of Great Sound
Before you even think about unboxing a microphone, let's talk about the single most important part of your studio: the room itself. A bad-sounding room can make even the most expensive gear sound terrible. You'll end up with recordings full of weird echoes, boomy bass, and unwanted background noise. Getting the room right from the start is the most critical step you can take toward getting professional-sounding audio.
This isn't as complicated as it sounds. You don't need a degree in physics, just a willingness to make a few practical adjustments. A few simple changes can make a world of difference and save you from hours of frustration trying to fix things in the mix later.
Finding the Best Room in the House
Not every room is cut out to be a studio. The ideal spot is going to be quiet—away from street noise, humming refrigerators, or roommates who like to chat. Basements or rooms with just a few small windows are often great choices because they provide a bit of natural sound isolation.
If you have the option, try to avoid perfectly square rooms. Why? They're a nightmare for standing waves, which is when certain bass frequencies get trapped and amplify themselves, making your recordings sound muddy and unbalanced. A rectangular room is a much safer bet.
Also, take a look at the surfaces. Hard floors, big windows, and bare drywall are your enemies, as they reflect sound all over the place, creating a harsh echo. A room that already has carpeting, some furniture, or a bookshelf is a much better starting point.
The goal isn't to build a completely dead, silent chamber. It's about creating a controlled space where the only thing your microphone hears is what you want it to hear. A quiet room with minimal echo is the bedrock of any good home studio.
The image below gives you a good idea of how to organize the central hub of your space—your desk.

As you can see, a clean, well-organized layout with your monitors, interface, and microphone within easy reach creates a workflow that feels efficient and keeps you in the creative zone.
Smart Acoustic Treatment That Won't Break the Bank
Once you've picked your room, it's time to tame its natural sound. This doesn't mean you have to plaster every inch of your walls with expensive foam panels. In fact, a few strategic, budget-friendly treatments will give you the most bang for your buck.
A simple way to find problem spots is with the "mirror trick." Sit in your chair where you'll be mixing, and have a friend slide a mirror along the walls to your left and right. Any spot where you can see one of your studio monitors in the mirror is a first reflection point—the perfect place for an acoustic panel.
You can actually build your own high-quality acoustic panels for cheap. All you need are some wooden frames, some mineral wool insulation (like Rockwool), and some breathable fabric to wrap them in. These DIY panels work way better than the thin foam squares you see online, especially for soaking up those troublesome mid and low frequencies.
Below is a quick comparison of the most common acoustic treatments you'll encounter.
Acoustic Treatment Options For Your Home Studio
Choosing the right treatment depends on the specific acoustic problem you're trying to solve. This table breaks down the most common options, explaining what they do and where they work best.
Treatment Type | Primary Function | Best Placement Area | Budget Level |
|---|---|---|---|
Acoustic Panels | Absorbs mid-to-high frequencies, tames flutter echo. | First reflection points on side walls and the wall behind monitors. | Low to Mid |
Bass Traps | Absorbs low-frequency buildup, tightens up the bass. | Room corners (floor-to-ceiling is best), wall-ceiling corners. | Mid to High |
Diffusers | Scatters sound waves to prevent harsh reflections. | Back wall behind the listening position. | Mid to High |
Rugs/Furniture | General absorption and diffusion, reduces reflections. | Floors, against walls (e.g., a plush couch). | Low (use what you have) |
Remember, the goal is balance. A few well-placed panels and bass traps will almost always be more effective than covering an entire wall with one type of treatment.
A few other simple tips can make a big difference:
Don't forget the corners. Bass loves to build up in the corners of a room. Placing bass traps there, stacked from floor to ceiling if possible, will make a massive difference in cleaning up a boomy low end.
Use what you have. Seriously, a plush couch, a thick rug, or a packed bookshelf are all fantastic sound absorbers and diffusers. They help break up sound waves naturally.
Keep it clean. A tidy workspace isn't just for looks. It smooths out your workflow and minimizes interference. Using some effective cable management solutions will prevent frustrating buzzes and accidental unplugs.
Choosing Your Essential Recording Gear
So, you’ve treated your room and it's ready for action. Now for the fun part: filling it with gear. Walking into a music store or scrolling through endless online options can be overwhelming, with all the technical jargon and blinking lights. But here's the secret: building a great home recording studio setup isn't about buying the most expensive toys. It’s about making smart, focused investments in a few essential pieces that will capture your sound reliably.
Let's cut through the noise. You don’t need a mountain of equipment to get started. A minimal setup actually forces you to learn your tools inside and out, which is a huge advantage. We'll focus on the four pillars of any home studio: the audio interface, microphone, headphones, and studio monitors.
The Audio Interface: Your Studio's Central Hub
Think of the audio interface as the translator for your studio. It takes the analog signal from your microphone or instrument and converts it into a digital signal your computer can understand. Then it does the reverse, turning digital audio from your computer back into an analog signal you can hear through your headphones and speakers. It's the nerve center of your whole operation.
For most people starting out, a simple 2-channel interface is the perfect sweet spot. This gives you two inputs, which means you can record things like:
Your voice and an acoustic guitar at the same time.
A stereo keyboard in a single take.
Two different mics on a single guitar amp for a fuller sound.
When you're shopping, look for an interface with "combo jacks." These are incredibly useful because they can accept both XLR cables (for mics) and ¼-inch cables (for guitars and keyboards). Also, make sure it has "phantom power"—usually a little button labeled "+48V." You'll need this to power most condenser microphones.
Choosing Your First Microphone
This is where your sound truly begins its journey into the digital world. While there are thousands of mics out there, your first purchase should be a versatile workhorse. For a home studio, that almost always means a large-diaphragm condenser microphone.
Condenser mics are incredibly sensitive and capture a ton of detail, making them perfect for vocals, acoustic instruments, and anything with subtle nuances. They’re what give recordings that professional, "larger-than-life" texture. On the other hand, a dynamic microphone is more rugged and less sensitive, which makes it great for loud sources like guitar amps or drums, but not the best choice if you can only have one mic.
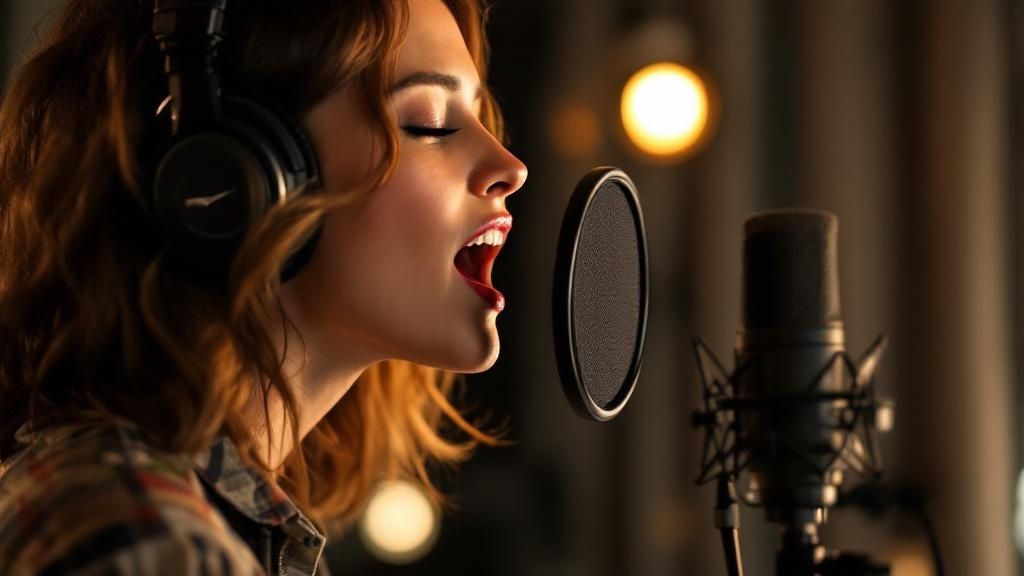
Pro Tip: Don't just stick your mic in front of your face and hit record. Experiment with its position. Moving a condenser mic just a few inches closer to your mouth can dramatically add warmth and intimacy to your vocals. This is called the "proximity effect," and learning to use it is a game-changer.
Studio Monitors Versus Headphones
How you listen back to your music is just as critical as how you record it. This is a crucial part of your home recording studio setup, and it comes down to two key tools: studio monitors and headphones.
Studio Monitors: These aren't your average bookshelf speakers. They're specifically designed to give you a "flat," uncolored, and honest sound. Unlike consumer speakers that might boost the bass to sound more impressive, monitors tell you the truth about your audio. This is essential for mixing because it ensures your music will sound good everywhere, from a car stereo to a pair of earbuds.
Studio Headphones: For recording, you'll need a good pair of "closed-back" headphones. These create a seal around your ears, which prevents the click track or backing music from "bleeding" into your microphone while you're performing. They're also fantastic for catching tiny details, like subtle clicks or background hums, that your monitors might miss in a less-than-perfect room. You can definitely start mixing on headphones, but it's always best to use them as a second opinion to your monitors.
The Growing Market of Home Creators
The move toward building personal recording spaces is more than just a passing trend—it's a fundamental shift in how music gets made. The U.S. market for audio production studios, which is closely tied to this home recording boom, hit a value of about $1.8 billion in 2025. This growth shows a maturing industry where musicians are choosing the convenience and creative freedom of a home setup over renting expensive studio time, all thanks to more affordable technology. If you want to dive deeper into these industry trends, you can explore the full market data on IBISWorld.com.
This accessibility means you can create whenever inspiration strikes. And speaking of inspiration, having great gear is only one side of the coin. You also need powerful tools for the most important part—the song itself. Many artists find that a dedicated creative assistant helps them organize their ideas and craft stronger lyrics. For more on this, check out our guide on the top 5 songwriting tools.
But what about the lyrics you'll be recording? That's where a creative assistant can make all the difference. Lyric Studio offers AI-driven, context-aware lyric suggestions that adapt to your theme and genre, helping you smash through writer's block. Its "Magic Draft" feature can even generate a first verse and chorus to get your ideas flowing instantly.
Ready to pair your new gear with a powerful songwriting partner? Download Lyric Studio free on iOS. Please note that while the app is free to download, in-app purchases may apply.
The Digital Heart Of Your Studio
You've got your mics and monitors set up, but the real work—the creation, the mixing, the magic—happens inside your computer. This is the domain of the Digital Audio Workstation, or DAW. It’s the command center for your entire home recording studio, the place where you’ll arrange, record, and produce your music.
Think of your DAW as your virtual mixing board, tape machine, and effects rack all rolled into one. It’s the software that turns the raw audio you capture into a polished, finished track. Getting this part of your setup right is crucial for a smooth and frustration-free creative process.
Choosing a DAW That Fits Your Workflow
There's no single "best" DAW. The right one for you comes down to your style of music and what feels most natural to use. Some DAWs are built for electronic music, with incredible MIDI sequencing and virtual instruments. Others are champs at pure audio editing and mixing, making them the go-to for singer-songwriters and full bands.
The good news? Most of the big names offer free or "lite" versions. This is your golden ticket to test-drive their features and get a feel for the workflow without dropping any cash. Don't get lost in online forums arguing about which one is superior. Just download a couple of trials and see which one clicks.
If you're still on the fence, our guide on the best music production software for beginners can help you weigh the pros and cons of the top contenders.
Setting Up for Lag-Free Recording
One of the most infuriating things that can happen during a recording session is latency. That’s the slight, maddening delay between when you sing or play a note and when you hear it back in your headphones. It's usually a sign that your computer is struggling to process the audio in real-time.
Getting this sorted is all about tweaking your audio driver settings inside your DAW. Here’s what to look for:
Select the Right Driver: Dive into your DAW’s audio settings. Make sure you select the ASIO (for Windows) or Core Audio (for Mac) driver that came with your specific audio interface. Don't use your computer's generic built-in sound driver.
Adjust the Buffer Size: The buffer size tells your computer how much time it gets to process audio. A lower buffer size (like 128 samples or less) means less delay, which is perfect for recording. A higher buffer size (like 1024 samples) gives your computer more breathing room, which is better for mixing with lots of effects.
Key Takeaway: A good rule of thumb for any home studio is simple: low buffer for recording, high buffer for mixing. This one tweak will save you from both annoying delays and system crashes.
And if you’re trying to nail a specific sound, like a professional vocal mix, a good Pro Tools vocal tutorial can show you advanced techniques that the pros use every day.
Where Creativity Meets Technology
Your DAW is a powerhouse, but it's still just a blank canvas. The real core of any song is the idea—the lyrics, the melody, the feeling you want to convey. Before you even hit record, you need something powerful to say.
This is where a tool like Lyric Studio becomes a game-changer. Instead of just staring at a blinking cursor, you can jumpstart your writing session with AI as your creative partner.
As you can see, Lyric Studio gives you context-aware suggestions right as you write, helping you find that perfect word or phrase without losing your momentum.
By integrating this kind of creative assistance into your workflow, you can kill writer's block before it even has a chance to start. The "Magic Draft" feature can spit out a first verse and chorus to get you going, giving you a solid foundation to edit and build on. With integrated rhyme and thesaurus tools, you can refine your words so they really hit home when you finally bring them into your DAW.
Ready to make your songwriting just as powerful as your studio? Download Lyric Studio free on iOS and get your next great idea down. Please note that while the app is free to download, in-app purchases may apply.
Mastering Your Recording Workflow
So, you’ve got all this incredible gear. That's a huge step, but the equipment itself doesn't make the music. The real magic happens when you build a smooth, repeatable recording workflow. This process is what turns that fleeting idea in your head into a polished, finished track.
Think of it this way: a great workflow is the secret sauce that transforms your collection of gear into a true creative engine. It’s about being methodical and efficient without killing the vibe. Let’s dive into the practical side of things—the stuff that separates amateur recordings from professional-sounding ones.
Getting a Clean Signal: It Starts with Gain Staging
Before you even think about hitting that red record button, you need to get your levels right. This is called gain staging, and it's the absolute foundation of a good recording. All it means is setting the right volume for your microphone or instrument at every point in the signal chain, from the preamp on your audio interface to the fader in your DAW.
Your goal is to record a signal that’s strong and clear, but not so loud that it "clips" or distorts. Aim for your signal to peak somewhere around -12dB to -10dB on your DAW’s meters. This gives you plenty of "headroom," which is just a fancy way of saying you have space to work with during mixing and mastering without running into nasty digital distortion that can completely ruin a take.
A Quick Tip from the Trenches: So many people make the mistake of recording "hot" (too loud), thinking it will sound punchier. It won't. A clean recording with moderate levels gives you way more flexibility and will always sound more professional in the final mix.
Simple Mic Placement Tricks for Big Results
Where you put the microphone is just as important as which one you choose. You don't need to get lost in complex, multi-mic setups to hear a massive difference. A few simple adjustments can completely change your sound, especially for vocals and acoustic guitar.
For Vocals: Start by placing the mic about 6-10 inches from the singer’s mouth, aimed right at their lips. Always use a pop filter to soften those harsh "p" and "b" sounds. If you want a warmer, more intimate vibe, inch a little closer to the mic—this is called the proximity effect. For a brighter, more open sound, just back off a bit.
For Acoustic Guitar: A common rookie mistake is pointing the mic directly at the soundhole. This usually just gives you a boomy, muddy mess. Instead, try aiming the mic where the neck meets the body, right around the 12th fret. This spot captures a beautiful, natural balance between the crispness of the strings and the warm resonance of the guitar's body.
The Art of the Perfect Take: Comping
Let's be real: even the best musicians rarely nail a perfect performance in a single take. That’s where comping (short for compiling) saves the day. It’s a studio technique where you record several takes of a part—like a lead vocal or a guitar solo—and then stitch together the absolute best bits from each one.
Most DAWs are built for this. You can record in a loop, and the software will automatically organize each pass into its own "lane." Then, it's as simple as listening through and highlighting the phrases you love to create one seamless, "perfect" performance. It’s how the pros achieve that flawless, studio-quality sound.
The desire for this kind of control is a huge reason why the personalized music studio market, which was valued at about $8.2 billion in 2024, is projected to hit $16.3 billion by 2033. Musicians want to bridge the gap between home convenience and professional results. You can read more about this trend on Reports and Insights.
Of course, even with the best workflow, inspiration can be fickle. It's so important to find ways of staying motivated in your creative process to keep the ideas flowing.
A great workflow often starts before you even touch a microphone—it starts with the lyrics. With Lyric Studio, you can kickstart that process with AI-driven suggestions tailored to your genre and mood. The "Magic Draft" feature can instantly generate a verse and chorus, giving you a solid creative foundation to build on.
Ready to build a workflow that starts with inspiration? Download Lyric Studio free on iOS. Please note that while the app is free to download, in-app purchases may apply.
Getting Your Music Heard By The World

You’ve done it. You poured your heart and soul into writing, recording, and mixing a track you’re genuinely proud of. The creative journey inside your studio was a success, but what’s next? A great song deserves to be heard, and your home recording studio setup is the launchpad to make that happen.
Let's walk through the final, crucial steps that take your music from a file on your hard drive to a track people can stream anywhere in the world. This is the part that turns a personal project into a professional release.
The Final Polish: Mastering Your Music
Before you even think about uploading your song, it needs one last, critical touch: mastering. It's a common point of confusion, so think of it this way: mixing is about balancing the instruments inside your song. Mastering is about balancing your entire song against every other track out there.
The goal is to make your track sound incredible on every possible playback system—from cheap earbuds to a booming club sound system. A mastering engineer (or specialized software) uses subtle EQ, compression, and limiting to nail two key objectives:
Competitive Loudness: This ensures your song isn't jarringly quiet compared to other commercial tracks on Spotify or Apple Music.
Tonal Balance: This is the final polish on the frequency spectrum. It makes sure the bass is tight, the mids are clear, and the highs are crisp without sounding harsh or tinny.
Without mastering, your song might sound thin, quiet, or muddy next to professionally produced music. It’s the final coat of paint that gives your track that commercial-ready shine and ensures it makes the best possible first impression.
Choosing Your Path to the World
Okay, your track is mastered and ready. How do you actually get it onto Spotify, Apple Music, and other streaming platforms? This is where a digital music distributor comes in. These services are the essential bridge connecting independent artists like you to the world’s biggest digital storefronts.
You just upload your mastered audio file, your cover art, and some release info. For a small fee or a cut of your royalties, they do all the heavy lifting, delivering your music to dozens of platforms.
There are many distributors out there, each with different payment models and features. It’s worth doing a little digging to find one that fits your budget and goals. This step is what empowers you to join the wave of indie artists building careers on their own terms, straight from their home studios.
Your home studio is more than just a place to record; it's the operational hub for your entire music career. From writing the first lyric to distributing the final master, every part of the process starts right here, giving you complete creative and business control.
The rise of the home studio is a massive force behind the industry's growth. In fact, the broader music recording market, which includes everything from massive pro facilities to setups just like yours, is valued at around $60.73 billion in 2024. This boom is fueled by streaming and accessible tech, letting more creators than ever produce and release music. You can discover more insights about the music recording market's future.
Be Ready For Opportunity
One last thing: put together a simple Electronic Press Kit (EPK). Don't overthink it—this is just a digital folder with all the essential stuff someone might need to write about you or book you for a show.
Your EPK should include:
A short, engaging artist bio
A few high-quality promotional photos
Links to your music on streaming platforms
Your contact information
Having this ready to go means you can jump on opportunities instantly, whether it's from a blogger, a playlist curator, or a local venue. It shows you're serious.
Of course, none of this matters without a song that's worth sharing. The best lyrics connect with listeners on a deep, emotional level. Lyric Studio can be your dedicated creative partner here, offering AI-driven suggestions to refine your message and a “Magic Draft” feature to instantly build a powerful verse and chorus.
Don't let writer's block stall your next hit. Download Lyric Studio free on iOS and start writing lyrics that are ready for the world. Please note that while the app is free to download, in-app purchases may apply.
Common Questions About Setting Up a Home Studio
Jumping into your first home studio build is an exciting time, but it's also totally normal to have a ton of questions. Let's walk through some of the most common things people ask when they're getting started. My goal here is to give you straightforward, real-world answers so you can get on with the fun part: making music.
What’s a Realistic Budget for a Decent Home Studio?
You can put together a really solid beginner setup for somewhere between $500 and $800. That's a realistic budget that will get you the must-haves: a quality 2-channel audio interface, a versatile condenser mic, a good pair of studio headphones, and the cables to connect it all.
This assumes you already own a computer and are okay starting with a free or "lite" version of a DAW. The trick isn't to buy the most expensive gear right away. It’s to get reliable tools you can grow with and then upgrade as you figure out what you truly need.
Is Acoustic Treatment Really That Important?
Yes, one hundred percent. If you're serious about your sound quality, treating your room isn't optional—it's essential. An untreated room will splash sound all over the place, creating nasty echoes and frequency issues that can make even a top-of-the-line microphone sound bad.
Honestly, even a little bit of basic treatment makes a night-and-day difference. Putting up a few acoustic panels at your main reflection points and sticking some bass traps in the corners is probably the single biggest bang-for-your-buck investment you can make. It's what separates a demo from a professional-sounding track.
Can I Get Away With Just Mixing on Headphones?
You can definitely start out mixing on headphones, and they’re fantastic for catching tiny details. But relying on them exclusively is a classic rookie mistake. Headphones can give you a weirdly wide stereo image and often lie about how much bass is actually in your track. Your mix might sound amazing in your ears, but play it in a car or on a Bluetooth speaker, and it could fall apart completely.
The best workflow is to do most of your heavy lifting—your main volume and EQ balancing—on a pair of studio monitors. They give you the honest truth. Then, switch over to your headphones to check for clicks, pops, and other fine details.
Why Do My Vocals Sound So Thin?
Thin vocals are a super common problem, and it usually boils down to a couple of things. First, take a hard look at your mic placement. If you're standing too far back, you're losing the "proximity effect," which is that natural low-end boost that gives vocals warmth and presence. Try getting closer, maybe around 6-10 inches from the mic.
Next, check your EQ settings. It’s really easy to be too aggressive with a high-pass filter and accidentally slice out the fundamental frequencies that give a vocal its body. And of course, the song itself has to be strong. Knowing how AI can help songwriters can be a great way to push past creative hurdles and make sure your lyrics are hitting just as hard as your performance.
If those adjustments don't work, you could try a different mic if you have one handy, as some are naturally warmer than others. But more often than not, a simple tweak in your recording technique is all it takes to get that full, rich vocal sound you're after.
Every great song starts with powerful lyrics. With Lyric Studio, you get an AI-powered partner to help you discover the perfect words. Its context-aware suggestions and integrated rhyme and thesaurus tools are there to help you crush writer's block and turn your ideas into finished tracks.
Ready to write your next hit? Download Lyric Studio free on iOS. Please note that while the app is free to download, in-app purchases may apply.

SCAN TO GET