Back to articles
How to Record Vocals at Home: A Complete Guide to Pro Sound

Getting started with recording vocals at home has never been easier, and you can put together a killer setup for just a few hundred dollars. Honestly, all you really need to get going is a core toolkit: a solid microphone, an audio interface to get that sound into your computer, and a good pair of headphones.
With just those three items, you're well on your way to capturing clear, professional-sounding vocal takes right from your own space.
Building Your Home Vocal Recording Setup
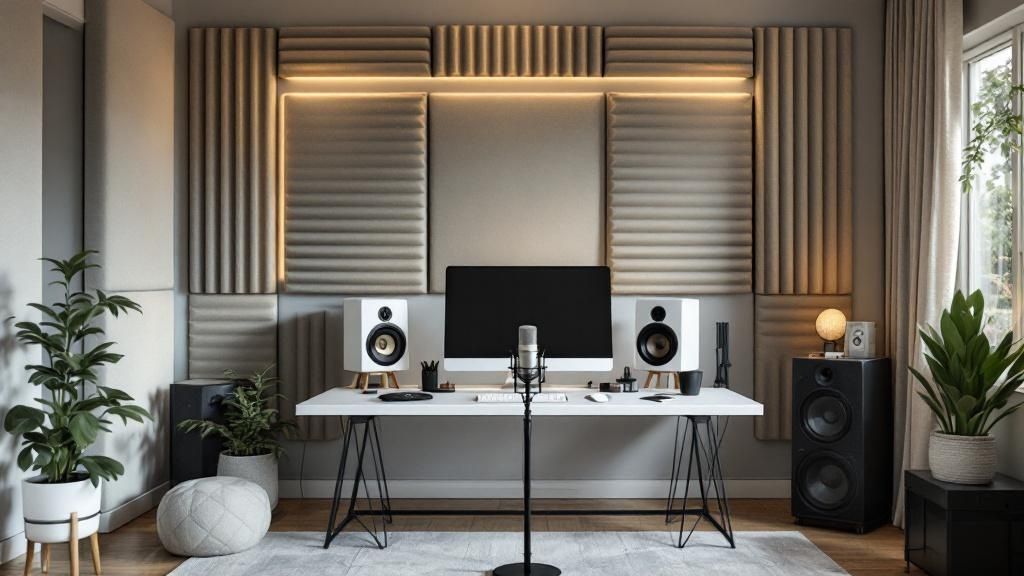
Before you hit record on that perfect vocal take, you need the right tools for the job. Don't worry, this doesn't have to be a complicated or expensive process. The real goal is to create a reliable signal path that captures your voice with total clarity, giving you a pristine recording to work with later.
Thanks to modern technology, what used to cost thousands in studio time can now be achieved at home for as little as $300 to $500. By choosing your gear wisely and making a few tweaks to your room, you can produce vocal recordings that sound amazing.
So, let's break down the essential components you'll need.
To give you a quick overview, here's a look at the essential gear you'll need to start recording vocals at home.
Core Home Vocal Recording Gear at a Glance
Component | What It Does | Why You Need It |
|---|---|---|
Microphone | Captures your voice's sound waves and converts them into an electrical signal. | This is the first and most critical step in capturing your performance. The mic's quality directly impacts your sound. |
Audio Interface | Converts the analog signal from the mic into a digital signal for your computer. It also powers the mic and provides headphone outputs. | Your computer can't understand a raw microphone signal. The interface is the essential translator between your analog gear and your digital world. |
Headphones | Let you hear the backing track while you record, without the sound leaking into your microphone. | Essential for hearing yourself clearly and preventing "mic bleed," which keeps your vocal track clean. |
Accessories | Includes a pop filter, mic stand, and XLR cable to connect and position your gear properly. | These are the small but vital pieces that make your setup functional and help you get the best possible sound. |
Each piece plays a crucial role in the signal chain, ensuring your voice is captured cleanly and accurately from the moment you sing into the mic until it's saved on your computer.
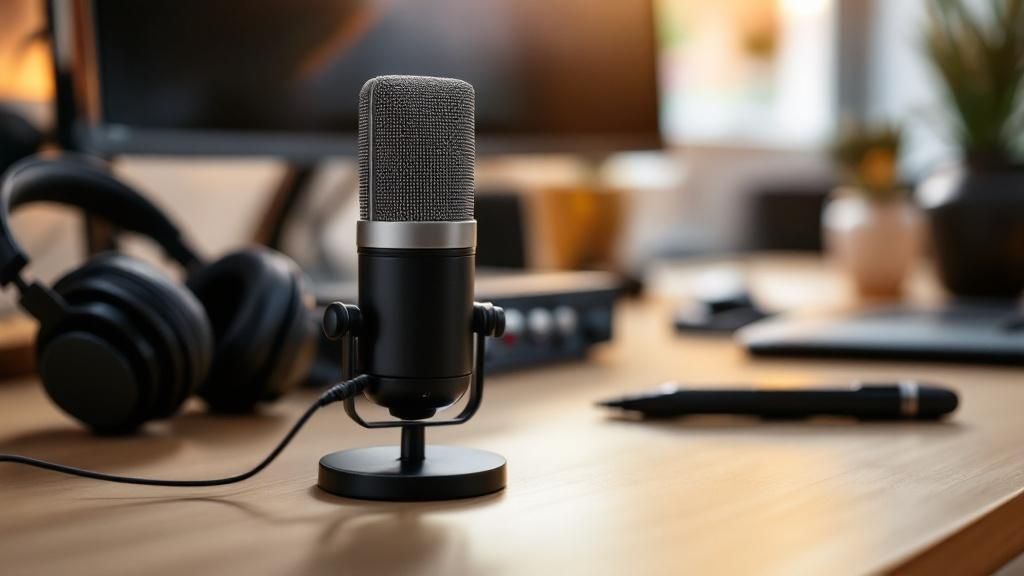
The Microphone: Your Voice's First Impression
Think of the microphone as the most important part of your vocal chain. It’s where your voice first meets technology, and its character will completely define the raw sound of your recordings. You'll mainly be choosing between two types: condenser and dynamic.
Condenser Microphones: These are the go-to for studio vocals. They’re incredibly sensitive and fantastic at picking up all the rich detail, subtle nuances, and high-frequency "air" in a singer's voice. This sensitivity makes them perfect for quiet, controlled spaces where every little aspect of the performance counts.
Dynamic Microphones: These mics are tougher and less sensitive. They do a great job of rejecting background noise, making them a much more forgiving choice if your room isn't acoustically perfect. They're also great for louder, more aggressive singing styles.
For most home studio projects, a large-diaphragm condenser mic is your best bet for that classic, professional vocal sound.
A Quick Tip from Experience: Don't get hung up on a high price tag. An entry-level condenser mic used correctly in a decent-sounding room will always sound better than a super-expensive one in a noisy, echoey space. Your recording environment is just as important as your gear.
The Audio Interface: The Bridge to Your Computer
Your microphone creates an analog signal, but your computer only speaks digital. The audio interface is the magic box that bridges that gap. It takes the analog signal from your mic, converts it into digital data your computer can record, and also gives you a high-quality output for your headphones.
Critically, the interface contains a preamp. A preamp boosts the microphone's naturally weak signal to a stronger, more usable "line level" without adding a bunch of hiss or noise. A good interface with clean-sounding preamps is absolutely essential for a clear, professional vocal sound.
If you want to go deeper on this, check out our complete guide to putting together a home recording studio setup.
Headphones and Accessories: The Final Touches
A few more pieces will round out your setup and make a huge difference in your workflow.
Closed-Back Headphones: These are non-negotiable for recording. They seal around your ears, which stops the music you're singing along to from "bleeding" into the microphone. This is key to getting a clean, isolated vocal track.
A Pop Filter: This is that simple mesh screen you see between a singer and the mic. It breaks up the puffs of air from "p" and "b" sounds (known as plosives) that can create ugly popping noises in your recording.
A sturdy Mic Stand and an XLR Cable are the last two things you'll need. One holds the mic steady and in the right position, and the other connects it to your interface. Simple, but essential.
Once your gear is ready, it's time to focus on the lyrics. Lyric Studio can help you find the perfect words with AI-powered suggestions that fit your genre and theme. Its "Magic Draft" feature is great for kickstarting your creativity, generating a verse and chorus to get your ideas flowing.
Download Lyric Studio free on iOS and start turning those vocal recordings into finished songs. In-app purchases may apply.
Turning Any Room Into a Vocal Booth
You’ve got the gear, but that's only half the battle. So many people get frustrated with their home recordings, not realizing the room itself is the biggest problem. You don't need a perfectly soundproofed, professionally built studio to capture a great vocal performance. The real goal is much simpler: taming the sound reflections that bounce off hard surfaces and make your vocals sound distant and muddy.
Believe it or not, you can drastically improve your room's sound for free. With a little creative thinking and some stuff you already have lying around the house, you can build a makeshift vocal booth that will give you a much cleaner, more professional sound.
Find the Sweet Spot With the Clap Test
Before you start dragging furniture around, you need to understand your room's acoustic personality. The quickest way to do this is with the good old-fashioned clap test.
Just stand in the middle of your room and give a single, loud clap. Listen. What do you hear right after?
If you hear a harsh, zinging echo, that's flutter echo. It’s the sound of the clap bouncing rapidly between two parallel hard surfaces, like your empty walls. That’s your enemy.
Now, walk around the room—try near the walls, in the corners—and keep clapping. You're hunting for the spot where that echo is the weakest. That's your starting point.
A Quick Pro Tip: Steer clear of setting up your mic right in the center of the room or jamming it into a corner. The middle is where sound waves love to meet up and create weird frequency issues. Corners, on the other hand, act like megaphones for bass, which will make your voice sound boomy and unnatural.
Use Everyday Items for Acoustic Treatment
Okay, you've found a promising spot. Now it's time to kill those reflections. The physics here is simple: soft, dense materials absorb sound, while hard, flat surfaces reflect it. Time for a scavenger hunt around your home.
Heavy Blankets & Duvets: These are your secret weapon. Drape them over chairs, open closet doors, or a couple of mic stands to build a little fort around your microphone.
Pillows & Cushions: Got some corners? Stuff them with pillows. This acts as a DIY bass trap, soaking up all that low-end energy that gets trapped in corners.
A Closet Full of Clothes: This is the classic home studio hack for a reason—it works. All those clothes create an uneven, sound-absorbing surface. Stand with your back to the room and sing into the closet. The clothes will absorb the reflections behind the mic.
You're not trying to make the room completely silent. The goal is just to create a small, "dead" zone right around the microphone. This gets you a dry, focused vocal track that's a dream to work with when it comes time to mix.
Block Out the World (As Much As You Can)
Treating the reflections inside your room is one thing, but keeping noise from the outside from bleeding into your recording is another. This is called isolation, and it’s what separates a clean take from one ruined by the mail truck driving by.
First, just listen. What do you hear? Is it traffic from the window? The hum of the fridge or an AC unit? Your job is to silence them before you press record.
Kill any fans, air conditioners, or buzzing appliances.
Shut all your windows and doors tightly.
If you've got a big gap under the door, roll up a towel or blanket and stuff it in the crack. It makes a bigger difference than you’d think.
Taking 10 minutes to prep your space this way can honestly save you hours of headaches later. Once your room is treated and you've nailed that clean vocal take, the next challenge is perfecting the lyrics. If a line isn't quite landing, Lyric Studio can provide AI-powered, context-aware suggestions to help you find the right words.
Keep your ideas flowing and sharpen your songwriting. Download Lyric Studio free on iOS to turn those clean vocal takes into finished songs, complete with rhyme tools and a thesaurus to keep you in the creative zone.
Getting Your Gear and DAW to Talk to Each Other
Alright, let's tackle the technical part: getting your gear hooked up and talking to your software. This might feel intimidating if you're new to home recording, but it's honestly just a matter of plugging a few things in the right place. Once you've done it once, it'll become second nature.
Think of it this way: you're just building a clean, simple path for your voice to travel from the microphone, through the interface, and into your computer.
First up, the physical connections. Grab your XLR cable. Plug one end into your microphone and the other into an available input on your audio interface. Easy. Now, take the USB or Thunderbolt cable that came with your interface and plug that into your computer. That's it. Your hardware is now connected.
Once everything is plugged in, remember that how you use the mic is just as important as the gear itself. Proper technique makes a world of difference.
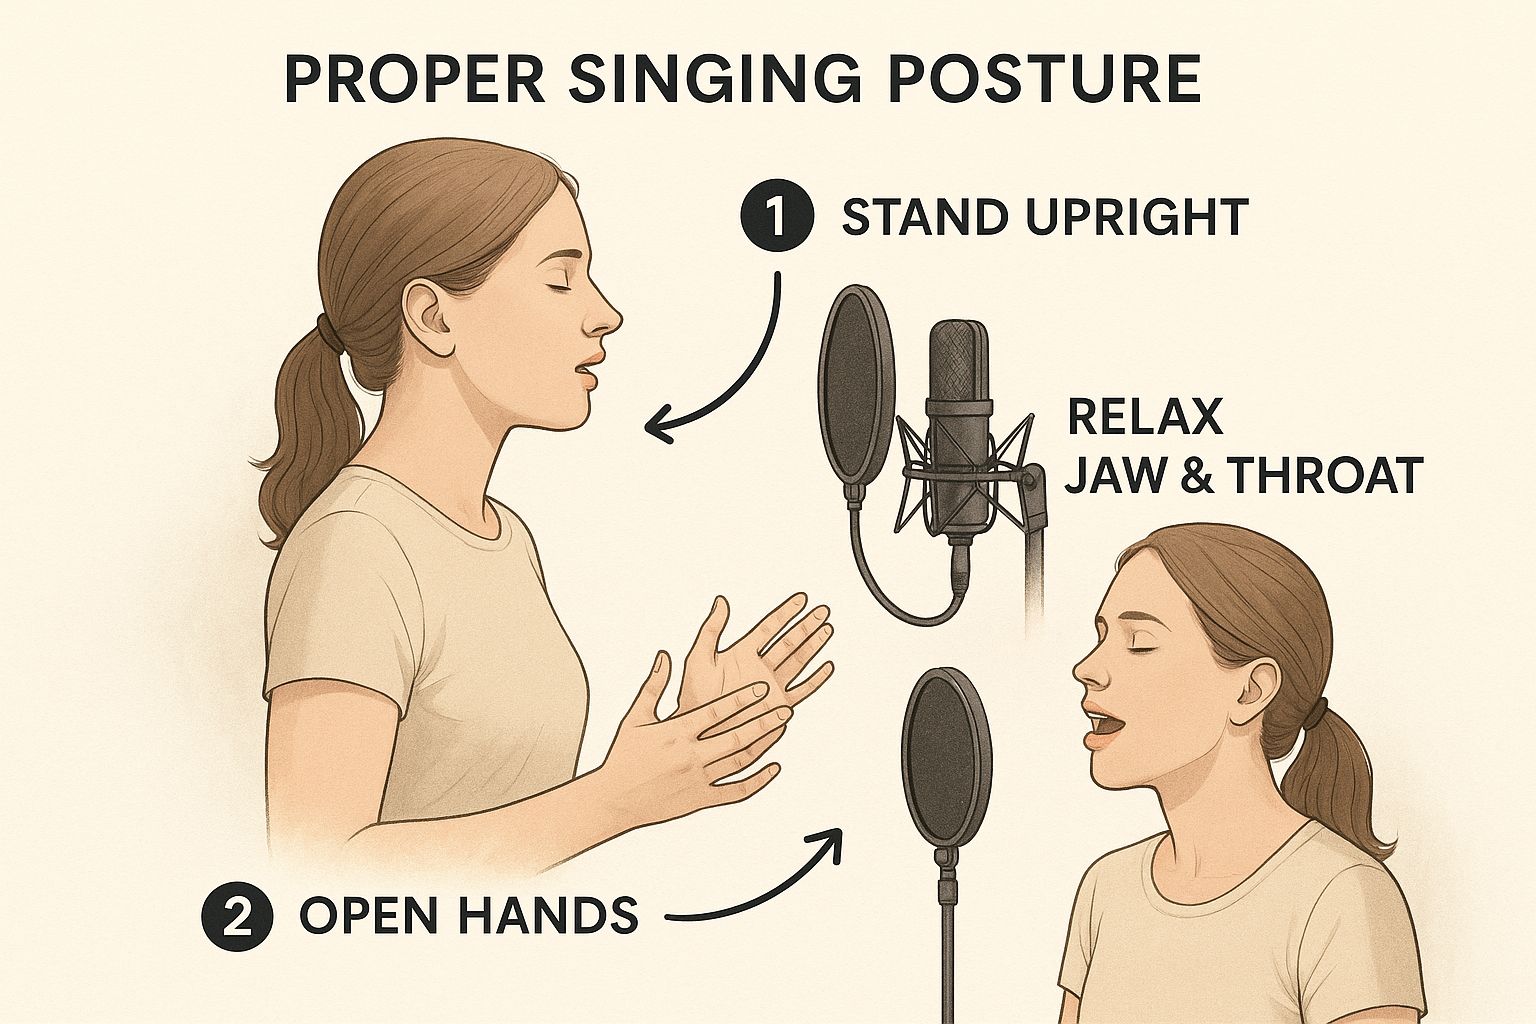
As you can see, things like your posture and distance from the mic are huge factors in getting that professional sound we're all chasing.
Configuring Your Digital Audio Workstation
With the hardware sorted, let's jump into the software. Your Digital Audio Workstation (DAW) is your command center for recording, editing, and mixing. The very first thing we need to do is tell it to listen to your fancy new audio interface, not your computer's built-in mic.
Here’s how you get that done:
Fire up your DAW and find the preferences, settings, or options menu. It's usually under a main menu tab like "File" or "Options."
Look for a section called 'Audio' or 'Playback Engine.'
In this menu, you'll see dropdowns for the "Input Device" and "Output Device." You need to select your audio interface for both.
This is the most critical step. Doing this ensures your DAW records from your quality mic (the input) and plays audio back through the headphones plugged into your interface (the output), completely bypassing your computer's subpar internal sound card.
Setting Up a Track for Recording
Now for the fun part. In your DAW, create a new audio track. On the track itself, you'll need to specify which input your mic is using. If you plugged your XLR cable into the first input on your interface, you’d select "Input 1" here.
Before you hit that big red record button, there are two last things to check.
First, your project's sample rate. For most home projects, 44.1 kHz is perfectly fine. But if you want to work at a slightly higher resolution, which is common in professional studios, setting it to 48 kHz is a great move.
Second, and this is crucial, you need to set your input gain. This is the knob on your audio interface that controls how loud the signal from the mic is. Sing into the mic at the same volume you'll use for the actual performance. While you do this, watch the level meter in your DAW. You want to adjust the gain so the signal peaks somewhere between -12dB and -6dB.
This "sweet spot" gives you a strong, clean signal without any risk of digital clipping—that nasty, unfixable distortion you get when the signal is too hot. Trust me, you can't fix clipping later.
Still on the fence about which DAW is right for you? Our guide to the best music production software for beginners can help you weigh your options. As you get more comfortable, you can also supercharge your process by utilizing powerful tools like Descript, which blends recording and editing into one smooth workflow.
Mastering Microphone Technique for Better Vocals
So, you've got a great microphone. That's a fantastic start, but how you use it is what truly separates a decent recording from a professional one. Think of your mic as an instrument—learning to work with it is the key to capturing the exact tone, emotion, and clarity you're hearing in your head.
This isn't about memorizing a bunch of rigid rules. It's about understanding a few core ideas that will radically improve your raw vocal tracks. Getting this right means your recordings will sound rich, clear, and full of life before you even touch an EQ or compressor. This is where that pro sound really begins.
Finding Your Vocal Sweet Spot
Every voice has its own character, which means your perfect mic position is going to be unique to you. The distance and angle you sing from can completely transform the sound. A solid starting point? Put your pop filter about one fist-width away from the microphone. Then, position yourself roughly another six inches back from that filter.
From here, it's all about listening and adjusting.
Getting too close? Singing right on top of the mic often creates a muddy, boomy sound that's hard to fix later.
Too far away? You'll end up with a thin, distant-sounding vocal that picks up a lot of unwanted room echo.
Sing a few lines and listen back critically. Does your voice sound balanced and present? If not, try moving an inch closer or further away and record again. The goal is to find that "sweet spot" where your voice just sounds right—natural and full.
Taming Plosives with a Pop Filter
A pop filter is a non-negotiable piece of kit, but many people don't use it correctly. Its whole job is to stop those aggressive bursts of air from "p" and "b" sounds—the plosives—from hitting the mic and creating a loud, distorted pop.
For it to work, you need to give it some space. A good rule of thumb is to place the filter 2-3 inches in front of the mic capsule. Don't just stick it right against the grille; it needs that gap to effectively diffuse the air.
Pro Tip: Still getting pops? Try a classic studio trick. Instead of singing straight into the mic's center, turn it just a hair so you're singing slightly off-axis, almost across the front of it. The air blast from the plosive will shoot right past the sensitive diaphragm, but your voice will still be captured perfectly.
Understanding the Proximity Effect
The proximity effect is a cool phenomenon you can use to your advantage. In short, the closer you get to most directional mics, the more the bass frequencies in your voice are boosted.
This is a powerful creative tool once you get the hang of it. Want a warm, intimate, radio-announcer vibe for a quiet verse? Move in a little closer to engage that low-end boost. When the chorus hits and you need a bigger, more powerful sound, just back off the mic a few inches. This reduces the bass boost and gives your vocal a more open, dynamic feel. Learning to "play" the mic like this gives you incredible tonal control right at the source.
The Art of Comping for a Flawless Performance
Let's be real: even the world's best singers rarely nail a perfect performance in a single take. This is where comping saves the day. "Comping" is short for compiling, and it's the process of recording several takes and then piecing together the best parts of each one to create a single, seamless, "perfect" vocal.
Here’s a simple way to approach it:
Record Multiple Takes: Lay down the same section of the song (like a verse or chorus) at least 3-5 times, each on its own track in your DAW.
Listen and Select: Go through each take and highlight the best words, phrases, or even single syllables. One take might have the perfect emotional delivery on one line, while another has a stronger delivery on the next.
Edit and Assemble: Carefully cut your favorite bits and move them to a new, final "comp" track. Use short crossfades at the edit points to make the transitions completely smooth and unnoticeable.
Once you’ve built that perfect vocal performance, you want to make sure the lyrics are just as strong. If a word or phrase doesn't quite land, Lyric Studio can be an amazing creative partner. Its AI helps you find context-aware suggestions for alternatives, and the built-in rhyme and thesaurus tools let you polish your word choices without killing your momentum.
Capture your best performance, then make your lyrics shine. Download Lyric Studio free on iOS and start crafting incredible tracks today.
Editing and Polishing Your Vocal Tracks
Alright, you've laid down some solid vocal takes. Now for the fun part: turning those raw recordings into a track that sounds truly finished and professional. This is where the real magic happens, taking what you captured and making it shine.
The first step for most producers is a process called comping (short for compiling). Think of it as creating a "dream take." You'll listen through all your recordings and cherry-pick the absolute best phrases, words, or even syllables from each one. Maybe the chorus from take two had incredible power, but you nailed the vulnerability of the first verse in take four. Comping lets you stitch those perfect moments together into a single, seamless performance.
Cleaning Up Your Audio
Once you have your master take assembled, it's time to get surgical and clean it up. This means getting rid of all the little distracting noises that can pull a listener out of the song. You'll want to zoom in on your track's waveform in your DAW and hunt for:
Loud breaths: While some breaths add emotion, others are just noisy. You don't always have to cut them completely; often, just lowering their volume is enough to make them sit nicely.
Mouth clicks and pops: These tiny, sharp sounds are more common than you'd think and can be really distracting. Editing them out makes a huge difference in how smooth the vocal sounds.
Background noise: No matter how quiet your room is, a little hiss or hum can sneak in. A noise-reduction plugin can help, but use a light touch. If you push it too hard, the vocal can start to sound robotic and unnatural.
It's amazing how far home studios have come. We're in an era where tracks made in a bedroom can genuinely compete with those from major studios. A big reason for this is how accessible pro-level software has become. In fact, since 2020, there's been a 20-30% year-over-year jump in sales for home recording gear. More and more artists are taking control of their sound right from home. If you're interested in the data behind this trend, you can dig into the full industry report on AnythingResearch.com.
The Three Essential Vocal Mixing Tools
With a clean, comped vocal track ready to go, you can start mixing. You could get lost in a sea of plugins, but honestly, you can get 90% of the way there with just three essential tools. Master these, and you'll be in great shape.
EQ (Equalizer): This is your tool for shaping the vocal's tone. A classic move is to cut some of the muddy frequencies (usually around 200-500 Hz) to remove any boxiness. Then, you can add a gentle boost way up high (around 8-12 kHz) to give the vocal some "air" and make it sparkle.
Compression: Compression is your secret weapon for a consistent vocal that sits perfectly in the mix. It evens out the performance by automatically turning down the loudest parts and bringing up the quietest ones. This ensures every word is heard clearly, without any sudden jumps in volume.
Reverb: A completely dry vocal can sound a bit jarring and disconnected from the music. Reverb fixes this by placing your vocal in a physical space. Whether you want the feel of a small, intimate room or a massive concert hall, adding a touch of reverb will make your vocal feel like it truly belongs in the track.
And of course, a great vocal performance starts with great lyrics. For more on that, take a look at our guide on songwriting tips for beginners.
Refining Lyrics and Ideas Post-Recording
Have you ever finished recording and realized a certain word or line just doesn't land right with the music? It happens all the time. The great thing is, your songwriting process doesn't have to stop just because you've hit record.
When you feel stuck, tools like Lyric Studio can be a massive help. It's like having a creative partner right there in the editor.
If a line feels clunky, the app's AI can suggest alternative phrasing that flows better with your melody. You can even filter suggestions by genre and mood to make sure they fit the vibe of your song, whether you're working on pop, R&B, or hip-hop. With a built-in thesaurus and rhyme finder, you can quickly tweak your lyrics and polish those ad-libs without losing your creative momentum.
Ready to turn your raw recordings into finished tracks? Download Lyric Studio free on iOS and start polishing your sound.
Common Questions About Recording Vocals at Home
When you're first diving into home recording, you're bound to have questions. It's totally normal. Moving from unboxing your gear to actually getting that perfect sound is a journey, and hitting a few bumps along the way is part of the process. Let's tackle some of the most common things people ask when they're learning the ropes.
What's the Most Important Gear for Recording Vocals?
If I had to pick just two things, it would be your microphone and your room's acoustics. Honestly, they're tied for first place.
You can have the most expensive mic in the world, but if you stick it in a room with bare walls and a nasty echo, your recordings will sound terrible. It’s a fact of life in audio. A great mic can't fix a bad room.
On the flip side, a decent, budget-friendly mic placed in a quiet, treated space can sound absolutely phenomenal. Your audio interface is also a key player, but the mic and the room are what shape the raw sound of your voice before it even hits the computer.
My Vocals Sound Thin and Weak (or Muddy and Boomy). How Do I Fix It?
Ah, the classic problem. This is almost always a mix of two things: how you're using the mic and how you're using EQ.
If your vocals sound thin or brittle, you're likely too far from the microphone. Try moving just an inch or two closer. This engages the proximity effect, a natural phenomenon that boosts the lower frequencies in your voice, adding that warmth and body you're looking for.
If your vocals are muddy or boomy, you might be too close, or you could be picking up some weird low-frequency buildup from the room itself. You can clean this up in the mix with an EQ plugin.
For muddiness: Use a gentle cut somewhere in the 200-500 Hz range. This is the "mud zone" where things can sound boxy or muffled.
For clarity: A little boost in the 2-5 kHz range can add presence and help the vocal slice through the other instruments without sounding harsh.
The real secret here is subtlety. Don't go crazy with your EQ changes, or you'll end up with a vocal that sounds completely unnatural. Make small tweaks, listen carefully, and stop when it sounds right.
Can I Actually Get Pro-Quality Vocals with Budget Gear?
Yes, one hundred percent. The myth that you need to spend thousands of dollars on gear to sound professional is a thing of the past. Today's budget-friendly equipment is more than capable of producing incredible results.
It's not about the price tag; it's about how you use what you have.
Professional quality comes from getting the fundamentals right:
Setting your gain properly so you're not clipping the signal.
Using good mic technique to capture a balanced, even performance.
Doing some basic room treatment to kill echoes and outside noise.
Putting in the time with thoughtful editing and mixing to polish the track.
I’ll say it again: an entry-level condenser mic used correctly in a well-treated closet will sound better than a $3,000 microphone in an echoey kitchen. Every time. Focus on your process, not just your shopping cart.
How Can I Get Rid of Background Noise in My Recordings?
The best way to remove background noise is to prevent it from being recorded in the first place. While you can try to fix it later with software, you almost always sacrifice a bit of your vocal's natural tone. Prevention is always the best strategy.
Start by being a detective. What's making the noise? Is it the hum of the air conditioner, your computer fan, or traffic outside?
Turn off everything you can before you press record. Seriously, everything.
Consider using a dynamic microphone. They are naturally less sensitive to sounds that are farther away, making them great for less-than-perfect spaces.
Check your mic's gain. If it's cranked up too high, it's essentially a vacuum for every little sound in the room.
If you’ve done all that and still have a little hiss or hum, a noise-reduction plugin can be used sparingly. But your goal should always be to get a clean recording from the start.
Of course, a great vocal take needs great lyrics. If you've nailed the performance but feel a line just isn't landing, Lyric Studio can be an amazing creative partner. It provides AI-powered suggestions that fit your song's vibe and genre, helping you find those perfect words. With its "Magic Draft" feature, you can even generate a full verse-and-chorus to blast through writer's block and keep your momentum going.
Ready to turn those polished vocal recordings into amazing songs? Lyric Studio can help you refine your lyrics with smart suggestions and intuitive writing tools.

SCAN TO GET