Back to articles
A Guide to Home Studio Acoustic Treatment

Proper home studio acoustic treatment isn't about soundproofing. It's about taming the sound inside your room so you can actually hear what you're doing. Think of it as creating an accurate, trustworthy listening environment by using tools like absorption panels and bass traps to manage echoes and rogue frequencies. Get this right, and your mixes will finally sound good everywhere, not just in your studio.
Why Your Room Is Your Most Important Gear
Before you drop another dime on a new microphone or plugin, let's talk about the most critical piece of gear you own: the room itself. Even if you have the best equipment money can buy, an untreated space will sabotage your sound, making everything sound amateur. Why? Because the room adds its own character, coloring every single sound you record and mix.
So many of us chase that "pro" sound by upgrading our tech, completely missing that our listening environment is the real bottleneck. If you've ever labored over a mix that sounded incredible in your studio but completely fell apart in the car or on a pair of earbuds, your room is almost certainly the culprit.
Common Acoustic Problems in Home Studios
Most rooms, especially in a home setting, are acoustic minefields. They create a skewed perception of your audio, tricking you into making bad mixing decisions. Here are the usual suspects:
Flutter Echo: Ever clap your hands in an empty hallway and hear that zingy, metallic ringing sound? That's flutter echo. It’s caused by sound bouncing rapidly between two hard, parallel surfaces, like your drywall.
Standing Waves: This is the big one for bass. When a specific low-frequency sound wave fits perfectly between two parallel walls, it creates a "standing wave." This phenomenon makes certain bass notes boom unnaturally loud in some spots while virtually disappearing in others. It's impossible to get your low end right when this is happening.
Excessive Reverb: In an untreated room, sound reflections build on top of each other, creating a messy wash of reverb that blurs the detail in your music. This can make vocals sound distant and muddy the separation between instruments.
The goal of acoustic treatment isn't to make your room totally dead and lifeless. The real aim is to create a controlled, predictable space where you're hearing your music—not the room's interference—so you can make creative decisions with confidence.
The Pillars of Acoustic Control
Tackling these problems comes down to managing sound energy. The need for better sound control is so widespread that the acoustic panel market is projected to hit $2.58 billion by 2034, which just shows how crucial these tools have become for creators everywhere.
We have three main tools in our arsenal to get a room sounding balanced:
Absorption: This is all about using porous materials, like rigid fiberglass or mineral wool, to soak up sound. These panels convert sound energy into a minuscule amount of heat, which stops the sound from bouncing back into the room. It’s your primary weapon against flutter echo and overall reverb.
Bass Trapping: Think of this as absorption on steroids, but specifically for low frequencies. Bass energy is powerful, builds up in the corners of your room, and is the hardest to control. Bass traps are designed to handle it.
Diffusion: Instead of absorbing sound, diffusers scatter it in many different directions. This breaks up harsh, direct reflections without sucking all the life and natural ambience out of the room, resulting in a more open, spacious sound.
Getting a handle on these concepts is a core part of building a great home recording studio setup. Once you've got your room sounding right, you'll want a creative partner that can keep up. That's where Lyric Studio comes in, offering AI-driven, context-aware lyric suggestions and integrated rhyme tools to help you capture inspiration the moment it strikes.
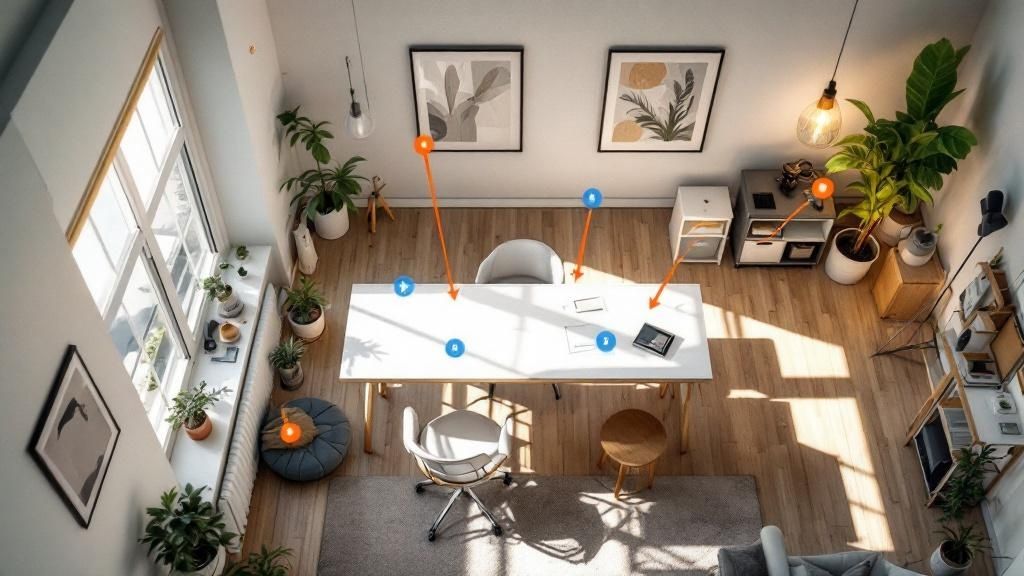
How to Find and Fix Your Room's Problem Spots
Before you start sticking panels on the walls, you need a game plan. Every room has its own unique acoustic personality, filled with quirks and "hotspots" that can mess with your sound. The good news? You can map out these problem areas without dropping a ton of cash on fancy measurement gear.
First things first, let's talk about a fix that costs nothing: speaker and listening position. You want to form an equilateral triangle between your two speakers and your head. A great starting point for your listening chair is about 38% of the way into the room from the wall your speakers are facing. This is often called the Cardas Rule, and it’s a surprisingly effective way to sidestep the worst of the bass buildup right from the get-go.
Pinpointing Problem Reflections
With your gear in a better spot, it's time to go on a hunt for the specific issues plaguing your room. A couple of old-school tricks are all you need to create an "acoustic map" that shows you exactly where treatment will make the biggest impact.
The Clap Test for Flutter Echo: Stand in the middle of your room and clap your hands—hard and sharp. Hear a metallic, zingy ring? That's flutter echo. It’s a classic sign of sound bouncing back and forth between two hard, parallel walls, and it can really muddy up your recordings.
The Mirror Trick for First Reflections: These are the real trouble-makers. First reflections hit your ears just milliseconds after the direct sound from your speakers, which smears your stereo image and makes everything sound less detailed. To find them, sit in your mixing chair and have a friend slide a small mirror along the side walls. Wherever you can see one of your speaker's tweeters in the reflection, that's a first reflection point. Mark it with a piece of tape. Do this for both side walls and don't forget the ceiling above you—that's a critical spot too.
This simple breakdown shows how to identify those reflection points, pick the right treatment, and get it placed correctly.
Remember, acoustic treatment isn't about guesswork or just making a room look cool. It's a strategic process. Finding the problem areas first means every dollar you spend will actually make a difference you can hear.
Taming the Low End
Let’s be honest, the biggest headache in most home studios is unruly bass. Low-frequency energy is powerful, and it has a nasty habit of piling up in the corners of a room. This creates "room modes," which are responsible for that frustrating effect where one bass note booms like crazy while another one seems to vanish completely. Good luck mixing a kick drum and bassline in a room like that.
A simple way to find these bass hotspots is to play a sine wave that sweeps from 20Hz to 200Hz. As it plays, walk around your room. You'll physically hear and feel the bass get louder and quieter in different spots. Pay close attention to the corners—they'll almost always be the loudest. That's exactly where your bass traps need to go.
Once you get your room's acoustic issues sorted out, you can finally start trusting your ears. Your creative decisions become more reliable, and you can let your songwriting instincts lead the way.
When you're ready to capture that next idea, Lyric Studio's "Magic Draft" feature can instantly generate an entire first verse and chorus to jump-start your session. Don't let a bad-sounding room or a bout of writer's block stop you.
Clear up your sound, then clear your mind. Download Lyric Studio free on iOS and bring a powerful creative assistant into your newly treated space. Note that in-app purchases may apply.
Choosing the Right Acoustic Treatment Tools
When you first start looking into acoustic products, it’s easy to get overwhelmed. The good news is that it all comes down to just a few key tools. Your real job is to pick the right treatments for the right problems—like taming echoes or clearing up muddy bass—so you’re making a genuine, audible improvement and not just buying acoustic snake oil.
Let's cut through the noise. The core of any solid home studio acoustic treatment plan relies on three workhorses: broadband absorption panels, bass traps, and diffusers. These are what will transform your room from an echo chamber into a reliable listening space. And please, forget about egg cartons and moving blankets. They simply don't have the density to control sound waves and are a complete waste of time.
The Foundation: Absorption and Bass Trapping
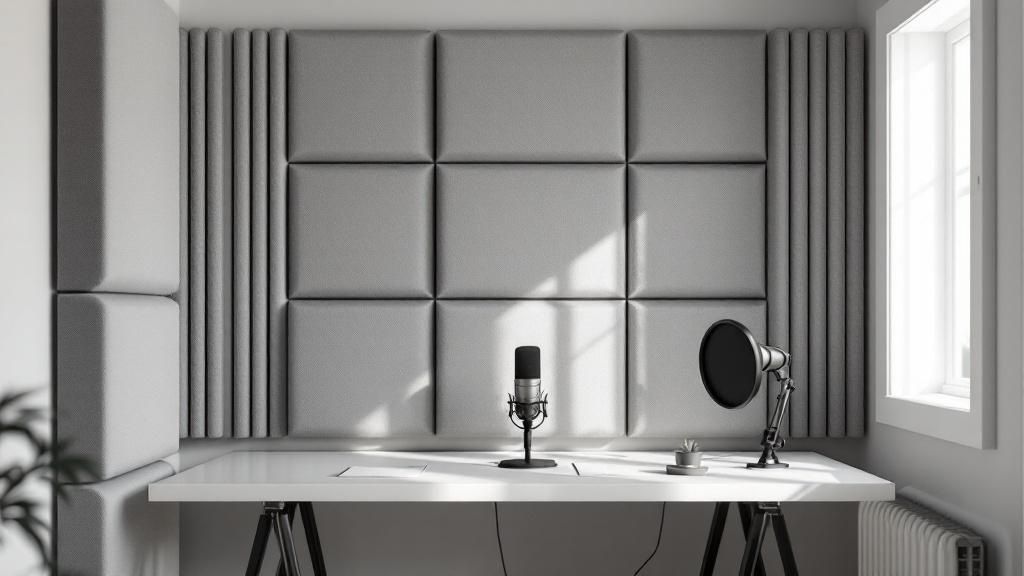
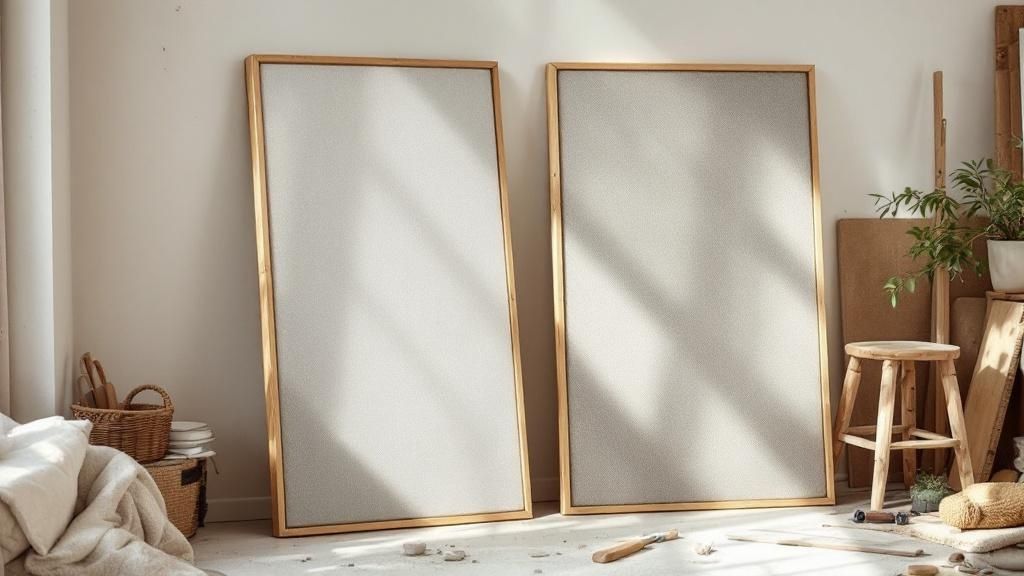
Think of broadband absorption panels as your main weapon against flutter echo and those pesky mid-to-high frequency reflections bouncing off your walls. These are typically made from dense materials like mineral wool or rigid fiberglass, which are worlds apart from flimsy acoustic foam. The difference is night and day; these dense materials are far more effective at converting sound energy into tiny amounts of heat, especially in those crucial lower-mid frequencies that give your music its body.
When it comes to panels, thickness matters. A lot. A standard two-inch panel is a decent starting point for your first reflection points, but jumping to a four-inch panel gives you much better control over the low-mids that tend to cloud up vocals and guitars. Another pro tip: even a two-inch panel becomes more effective if you space it two inches off the wall, creating an air gap that helps trap lower frequencies.
Bass traps are a different beast altogether. They're specialized, heavy-duty absorption panels built to wrangle the most powerful energy in your room: low frequencies. Bass waves are long and strong, so they require thick, dense treatment placed right where they love to pile up—the corners of your room. Getting these in place is non-negotiable if you want an accurate low-end response in your mixes.
Don't mistake acoustic foam for professional-grade absorption. While it can tame some high-frequency flutter, it does almost nothing for the mid and low frequencies where most mixing problems hide. Investing in dense fiberglass or mineral wool panels is the single best decision you can make for your room's sound.
To make this a bit clearer, here’s a quick breakdown of the main treatment types you’ll be working with.
Acoustic Treatment Options At A Glance
Treatment Type | Primary Function | Best Placement Locations | Good For |
|---|---|---|---|
Broadband Panels | Absorbing mid to high frequencies | First reflection points (walls, ceiling) | Reducing flutter echo, reverb, and reflections |
Bass Traps | Absorbing low frequencies | All vertical and horizontal room corners | Tightening up bass, clarifying low-end |
Diffusers | Scattering remaining reflections | Back wall, sometimes ceiling | Creating a sense of space, preventing dead sound |
Cloud Panels | Absorbing ceiling reflections | Above the listening position | Clearing up the stereo image, reducing ceiling bounce |
Each of these plays a specific role, and a good room treatment plan almost always involves a combination of them.
DIY vs. Pre-Made Solutions
So, should you build your own panels or buy them? Building them is a popular route for a reason. It's almost always cheaper, but it's going to cost you in time, tools, and a bit of sweat equity. The trade-off is simple: you exchange your time and effort for cost savings. On the other hand, pre-made panels from reputable companies offer professional looks and total convenience, saving you the hassle of sourcing materials and building frames.
The demand for these solutions is booming, which shows just how critical good acoustics are. The global market for architectural acoustic panels, valued at USD 7.87 billion, is expected to hit USD 12.26 billion by 2032. When you're kitting out your studio, don't forget specialized options like acoustic ceiling tiles for soundproofing, which can make a huge difference in the overall sound control.
A clear and controlled acoustic space is just as fundamental to making great music as having the right software. With genre and mood customization for hip-hop, pop, and more, Lyric Studio adapts to your unique sound, making it an essential tool for any modern songwriter.
Ultimately, treating your room is about creating a reliable canvas for your art. Once your audio environment is accurate, you can finally trust what you're hearing and let your creative instincts take over.
Putting Your Panels in the Right Places
You’ve got your gear—bass traps, absorbers, and maybe some diffusers. Now for the fun part: putting it all where it’ll do the most good. Where you hang your panels is every bit as important as the panels themselves. Tossing them up randomly will get you random, mediocre results. But with a smart plan, you can completely change how your room sounds and, in turn, how your mixes translate.
Think of it as a hierarchy of importance. We’re going to tackle the biggest problem areas first—the spots that give you the most bang for your buck. This isn't about wallpapering your studio; it's about making targeted, effective moves.
First Things First: The Mirror Trick Spots
The most damaging reflections are the ones that hit your ears first after leaving the speakers. These "first reflections" arrive just a split second after the direct sound, creating a smearing effect that blurs your stereo image and masks crucial details. Taming these is job number one.
You’ve already found these spots with the mirror trick, right? The key locations on your side walls and ceiling. Go ahead and place your broadband absorption panels there now. You’ll want one on the left wall and one on the right, perfectly centered at the height of your ears when you're in the listening position. The difference should be immediate—a tighter sound, clearer stereo field, and better separation between instruments.
Don't stop there. The ceiling right above your head is just as guilty. This is where a "cloud panel" comes in, hung horizontally. It's a game-changer for stopping sound from bouncing off the ceiling and down into your ears, which makes a huge difference in focus and clarity.
Honestly, if you just treat these three spots—the two side walls and the ceiling cloud—you’ll have solved probably 70-80% of your room's reflection issues. It’s the single most powerful thing you can do.
Tackling the Low-End Mess in the Corners
Once your early reflections are under control, it's time to go to war with the low end. Bass energy loves to pile up in the corners of a room, creating a lumpy, uneven response with huge peaks and dips right where you sit. This is bass trap territory.
For the best results, you really want to hit as many corners as you can. I always start with the two vertical corners on the wall behind the speakers. If you have the budget and the space, get the back corners, too. You’re aiming for floor-to-ceiling coverage if possible, because the more surface area you give those traps, the more of that chaotic bass energy they can soak up.
This isn't an optional step if you're serious about mixing. Getting the corners trapped correctly is what gives you that tight, punchy, and predictable low end. You'll finally be able to hear what your kick and bass are really doing.
The Finishing Touches for a Pro-Sounding Space
With the main problem areas handled, a few more panels can help dial in the room's overall balance.
Front Wall: The wall behind your speakers is another trouble spot. Sound fires backward from your monitors, hits that wall, and bounces right back at you, causing all sorts of phasey weirdness. A couple of absorption panels there will clean that right up.
Back Wall: The wall behind your listening position is the perfect candidate for diffusion. Unlike absorbers that just kill the sound, diffusers scatter the energy around. This breaks up strong, direct reflections without sucking all the life out of the room, adding a pleasant sense of space and dimension.
Now that your room is dialed in and sounding true, your creativity is free to fly. But even in a perfect room, writer’s block can sneak up on anyone. When it hits, Lyric Studio can be a huge help, offering AI-powered lyric suggestions that adapt to your theme and integrated rhyme tools to keep the ideas flowing.
Don’t let a creative slump derail your session. Download Lyric Studio free on iOS and see what a dedicated songwriting partner can do for you in your newly treated studio (note that in-app purchases may apply).
Moving Beyond Treatment to Sound Isolation
Up to this point, we've been deep in the world of home studio acoustic treatment. That's all about taming the sound inside your room to get a clear, accurate picture for mixing. But there's another piece of the puzzle that often gets mixed up with treatment: sound isolation, or what most people call soundproofing.
While treatment deals with reflections, isolation is about stopping sound from getting in or out. It's the difference between controlling a boomy kick drum in your mixes and preventing your neighbors from hearing that same kick drum at 2 a.m.
When Treatment Is Not Enough
Picture this: you've set up your bass traps perfectly and your reflection points are covered with panels. The room sounds great... but you can still hear the bus rumbling down the street. Or maybe your roommate is tired of hearing you track the same vocal take for the tenth time.
This is where acoustic treatment hits its limit. Absorption and diffusion won't do a thing to block outside noise or keep your sound contained. For that, you need to think about isolation.
The goal is to create a sealed environment, a bubble where outside noise stays out and your music stays in. Without it, a perfect take can be ruined by a passing siren, and your late-night creative flow can be cut short by a knock on the door.
The secret to soundproofing isn't complicated: it all comes down to mass and airtightness. Sound is just vibration traveling through air and solid structures. The more mass you put in its way and the fewer air gaps it can sneak through, the quieter your room will be.
Simple Steps for Better Sound Isolation
You don't necessarily have to build a professional-grade studio from the ground up. You'd be surprised how much you can improve your room's isolation with a few simple, and often cheap, fixes.
Air gaps are public enemy number one. Start by hunting them down and sealing them up.
Doors: The gap under your door is a massive sound leak. Install an automatic door bottom or even just a heavy-duty door sweep. Adding weatherstripping around the frame will seal the rest.
Windows: Grab some acoustic caulk and meticulously seal every tiny crack around the window frame and trim. If traffic noise is a serious problem, looking into DIY window soundproofing methods can make a world of difference.
For Serious Isolation: Acoustic Booths
If you've sealed all the gaps and it's still not quiet enough, it might be time for a more serious solution. I'm talking about an acoustic booth, which is essentially a pre-fabricated "room-within-a-room."
These are a significant investment, but for anyone making music in a noisy apartment or a crowded house, they can be an absolute lifesaver. They provide a very high degree of isolation, letting you record pristine audio no matter what's happening outside.
The demand for these quiet spaces is booming. The global market for acoustic booths hit USD 16.07 billion and is projected to climb to USD 22 billion by 2032.
Once your space is truly isolated, you can finally focus completely on the music. A quiet room gives you the freedom to create whenever inspiration strikes. When that moment comes, make sure you have the tools to capture it.
Got Questions About Acoustic Treatment? Let's Clear a Few Things Up.
Getting your room treatment right can feel a little daunting. A lot of myths and misinformation float around, so let's tackle some of the most common questions head-on. Nailing these concepts will save you a ton of time, money, and frustration down the road.
How Much Is Too Much?
This is a big one. Everyone worries about creating a space that's totally dead and lifeless. The truth? It's actually pretty hard to do by accident, especially if you're using a smart mix of absorption and diffusion.
A great starting point is aiming to treat somewhere between 25% and 50% of your total wall surface area. Don't just slap panels up randomly, though. Focus on the most critical spots first—your first reflection points and all the corners. From there, listen. If you're still hearing distracting flutter echo or the room feels too "live," you can add more treatment a little at a time. The goal is always control, not complete sonic elimination.
So, Can I Just Hang Up Some Blankets or Use Egg Cartons?
Ah, the classic DIY question. I get it, we all want to save a buck. But this is one of those myths that just won't die.
Sure, a heavy moving blanket might tame a tiny bit of high-frequency flutter, but that’s it. It’s completely useless against the mid and low frequencies where the real problems—like muddy bass and boxy sound—live. Bass energy will sail right through a blanket like it's not even there.
And egg cartons? Even worse. They might look a bit like diffusers, but they have none of the required mass or precisely calculated geometry to actually scatter sound waves effectively. Your best bet is to stick with materials engineered for acoustic performance, like dense mineral wool or rigid fiberglass.
Key Takeaway: Real acoustic treatment is about balanced absorption across the entire frequency spectrum. Blankets and egg cartons only touch the very highest frequencies, leaving you with a room that sounds tonally weird and muffled, not controlled.
What's the Deal with "Acoustic Paint"? Does It Actually Work?
Acoustic paint seems like the dream solution, right? Just roll it on and you're done. Unfortunately, it's mostly clever marketing.
These paints do have sound-absorbing fillers mixed in, but the layer you apply is incredibly thin. It can only impact the absolute highest frequencies, usually anything above 2,000 Hz.
It will do absolutely nothing for reverb, echoes, or bass buildup in your studio. You're far better off investing that money in proper panels and bass traps that deliver real, measurable results.
Once your room is acoustically treated and sounding great, your creative ideas can finally shine through. Lyric Studio is the perfect creative assistant for that clear-sounding space. Use its AI-driven, context-aware suggestions to smash through writer's block or lean on the integrated rhyme and thesaurus tools to find that one perfect word you've been searching for.
Download Lyric Studio free on iOS. (Note that in-app purchases may apply).

SCAN TO GET